How to convert video files with AVCWare Video Converter Ultimate for Mac? The following will show you a step-by-step tutorial to complete the conversion task.
This article includes 7 parts.
Firstly, download AVCWare Video Converter Ultimate for Mac and then install and run it.
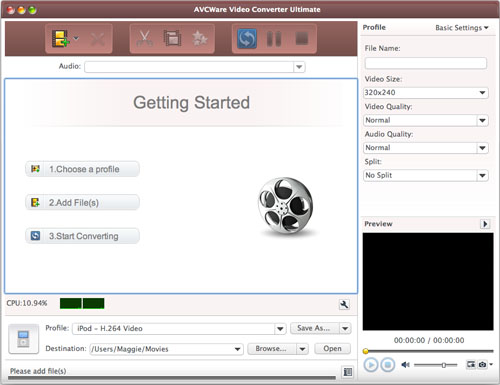
Step 1: Install and run the software
After installation, run the software. You can see the main interface as below.
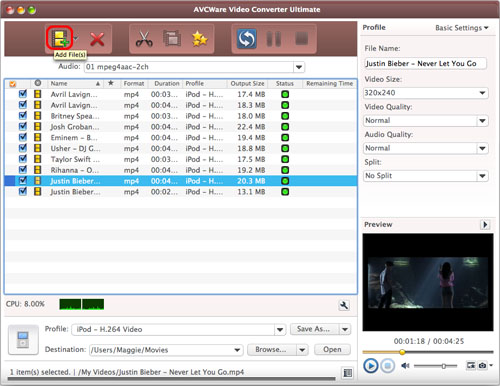
Step 2: Add Files
Click "Add File(s)" button on the toolbar or select "File > Add File(s)…" on the main menu to load files.
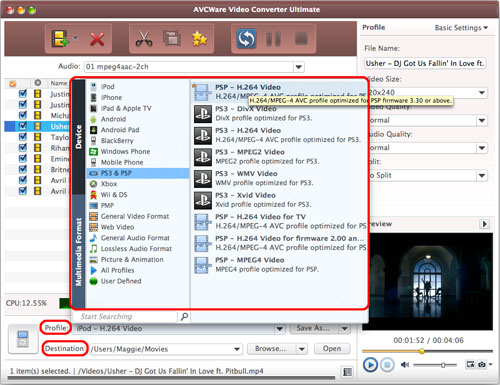
Step 3: Set output format
Select the files need to be converted and click "Profile" button to select the output format in the drop-down list. Then click "Browse…" button to specify destination folder for saving output files.
Tips:
1: We provide abundant profiles compatible with various popular devices. Especially all-around HD video formats are supported.
2: Many options for you to choose. The "Recently Used" option can record your recent usages automatically and it is convenient to use them again.
3: Search for the wanted profile quickly by entering the profile keyword in “Keyword” textbox of the profile list.
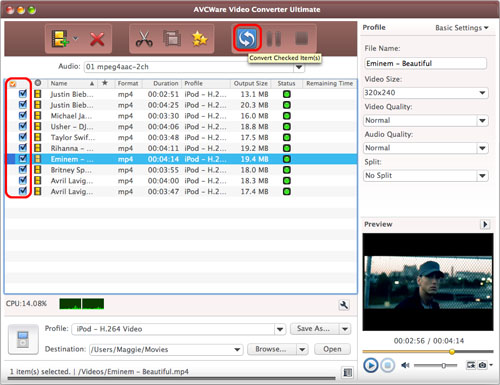
Step 4: Convert
After selected output profile, you only need to check the files you want to convert in the file list and click "Convert" button on the toolbar to complete the task.
Ok, the above is the simplest function in conversion. We provide you more functions as below!
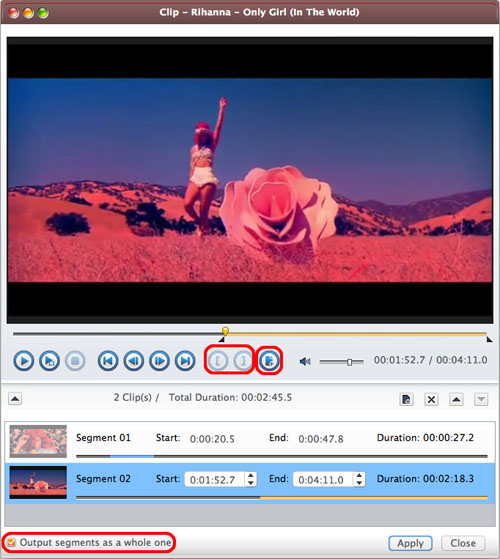
At first, choose the video file you want to clip. Then click "clip" button on the toolbar to enter “Clip” window. Set the start & end point to get the partial segment and repeat the action to get several segments at will. After clipping, check the "Output segments as whole one" option and merge the segments in the list into one file. And then click "Move Up" or "Move Down" button to specify the sequence of these segments.
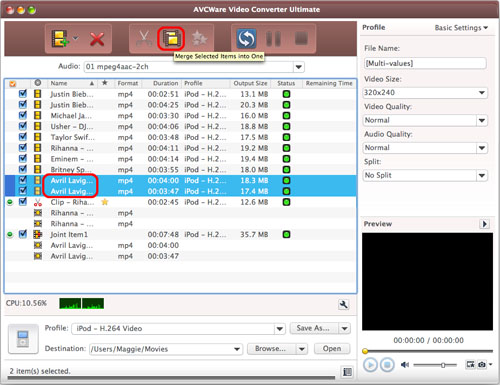
Select multiple files and click “Merge Selected Item into One” button on the toolbar to merge the selected files into one and create a merged item in the file list.
Tip:Only the files of same kind can be merged. E.g. video files cannot be merged with pictures.
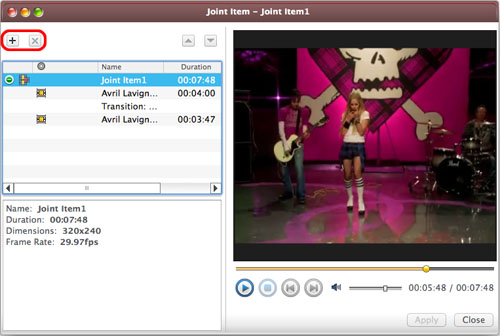
Firstly, right-click a merged video item in the file list, and select “Edit Joint Item” option from the right-click menu to open “Joint Item” window. Then select a video transition item and choose a transition effect from the transition panel on the left. Repeat this step to add transition effects to other videos. After adding transitions, choose a time length from “Duration” drop-down list as the transitional duration, and use “Move Up” or “Move Down” option to adjust the order of video items.
Tips:
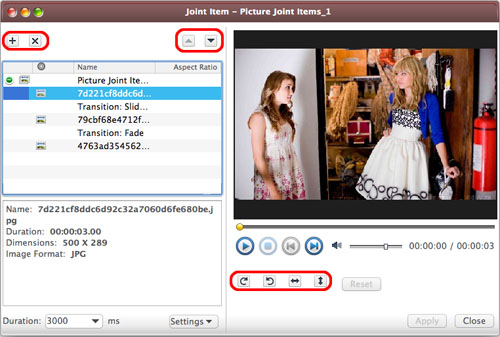
Right-click a merged picture item in the file list and choose “Edit Joint Item” option from the right-click menu to open “Edit Joint Item” window. Choose a picture item and set the picture’s direction by clicking “Rotate Clockwise”, “Rotate Counterclockwise”, “Flip Horizontal” or “Turn Vertical” button on the top right settings panel. Then you can adjust the order of the picture items by clicking “Move Up” or “Move Down” button, and click “Reset” button to reset all the settings to default.
You can also add transition effects for each picture item and choose a time length as the transition duration like what you have done in “Edit Merged Video Item” part.
Firstly, choose the video you want to edit, and then click “Effects” button on the toolbar to enter “Effects” window.
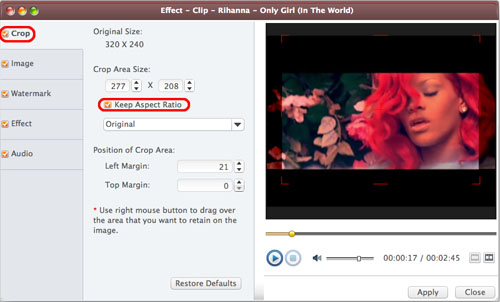
On “Crop” tab, enter height, width, left margin and top margin values to set the size and the position of the crop area. You can also adjust the crop area size and position by dragging the resizable handle and frame.
Besides, you can also check “Keep Aspect Ratio” option and choose the aspect ratio from the drop-down list. Click “Restore Defaults” to restore all settings to default, and preview the real-time effect in preview window on the right.
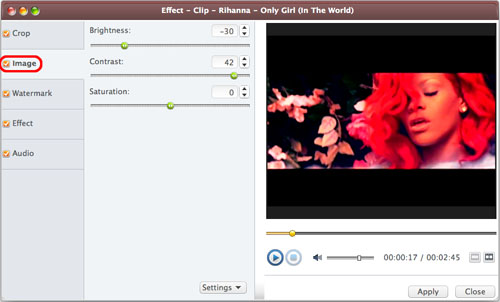
On “Image” tab, enter the value of the brightness/contrast/saturation in corresponding textboxes to set the video image’s brightness/contrast/saturation.
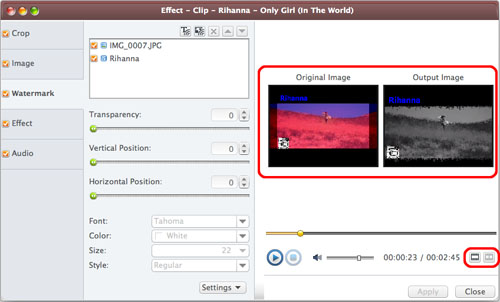
In “Watermark” tab, click “Add Text Watermark” or “Add Picture Watermark” button to import watermarks into the watermark list. Select a watermark and set its transparency, vertical position, horizontal position, font, color, size or style
Tip: You can add multiple picture and text watermarks into one video simultaneously.

In “Effect” tab, choose an effect for the output video from the effect list.

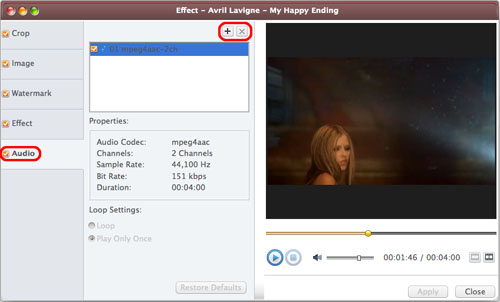
In “Audio” tab, click “Add Audio Track” button to add audio tracks into the list. And then choose the wanted one from the list as the background music for the video. You can also set the play mode as “Loop” or “Play Only Once”.
Click “Comparing Preview” button on the right preview panel to compare the edited file with the source.
To custom output size, select the video file and click “Tools > Bitrate Calculator” and input value to get exact video size.